
Have you ever found yourself cutting a perfect boondocking trip short because you ran out of water? If you’re like most van dwellers, water capacity—not battery power or solar—is your biggest limitation for extended stays in those pristine, remote locations.
In our recent adventures, we tackled this problem head-on by building a complete van water system that allows us to stay off-grid twice as long. This two-part project has been a game-changer for our van life experience, and today I’m sharing exactly how we did it.
The Complete Van Water System Overview
Our solution combines two key components that work together to double your water capacity without sacrificing valuable interior space:
- A portable water transfer pump that stores away when not in use
- A 28-gallon auxiliary water tank mounted underneath the van
This setup takes your van water system from limiting to liberating, extending your off-grid stays from just a weekend to a full week or more!
Part 1: The Portable Water Transfer Pump
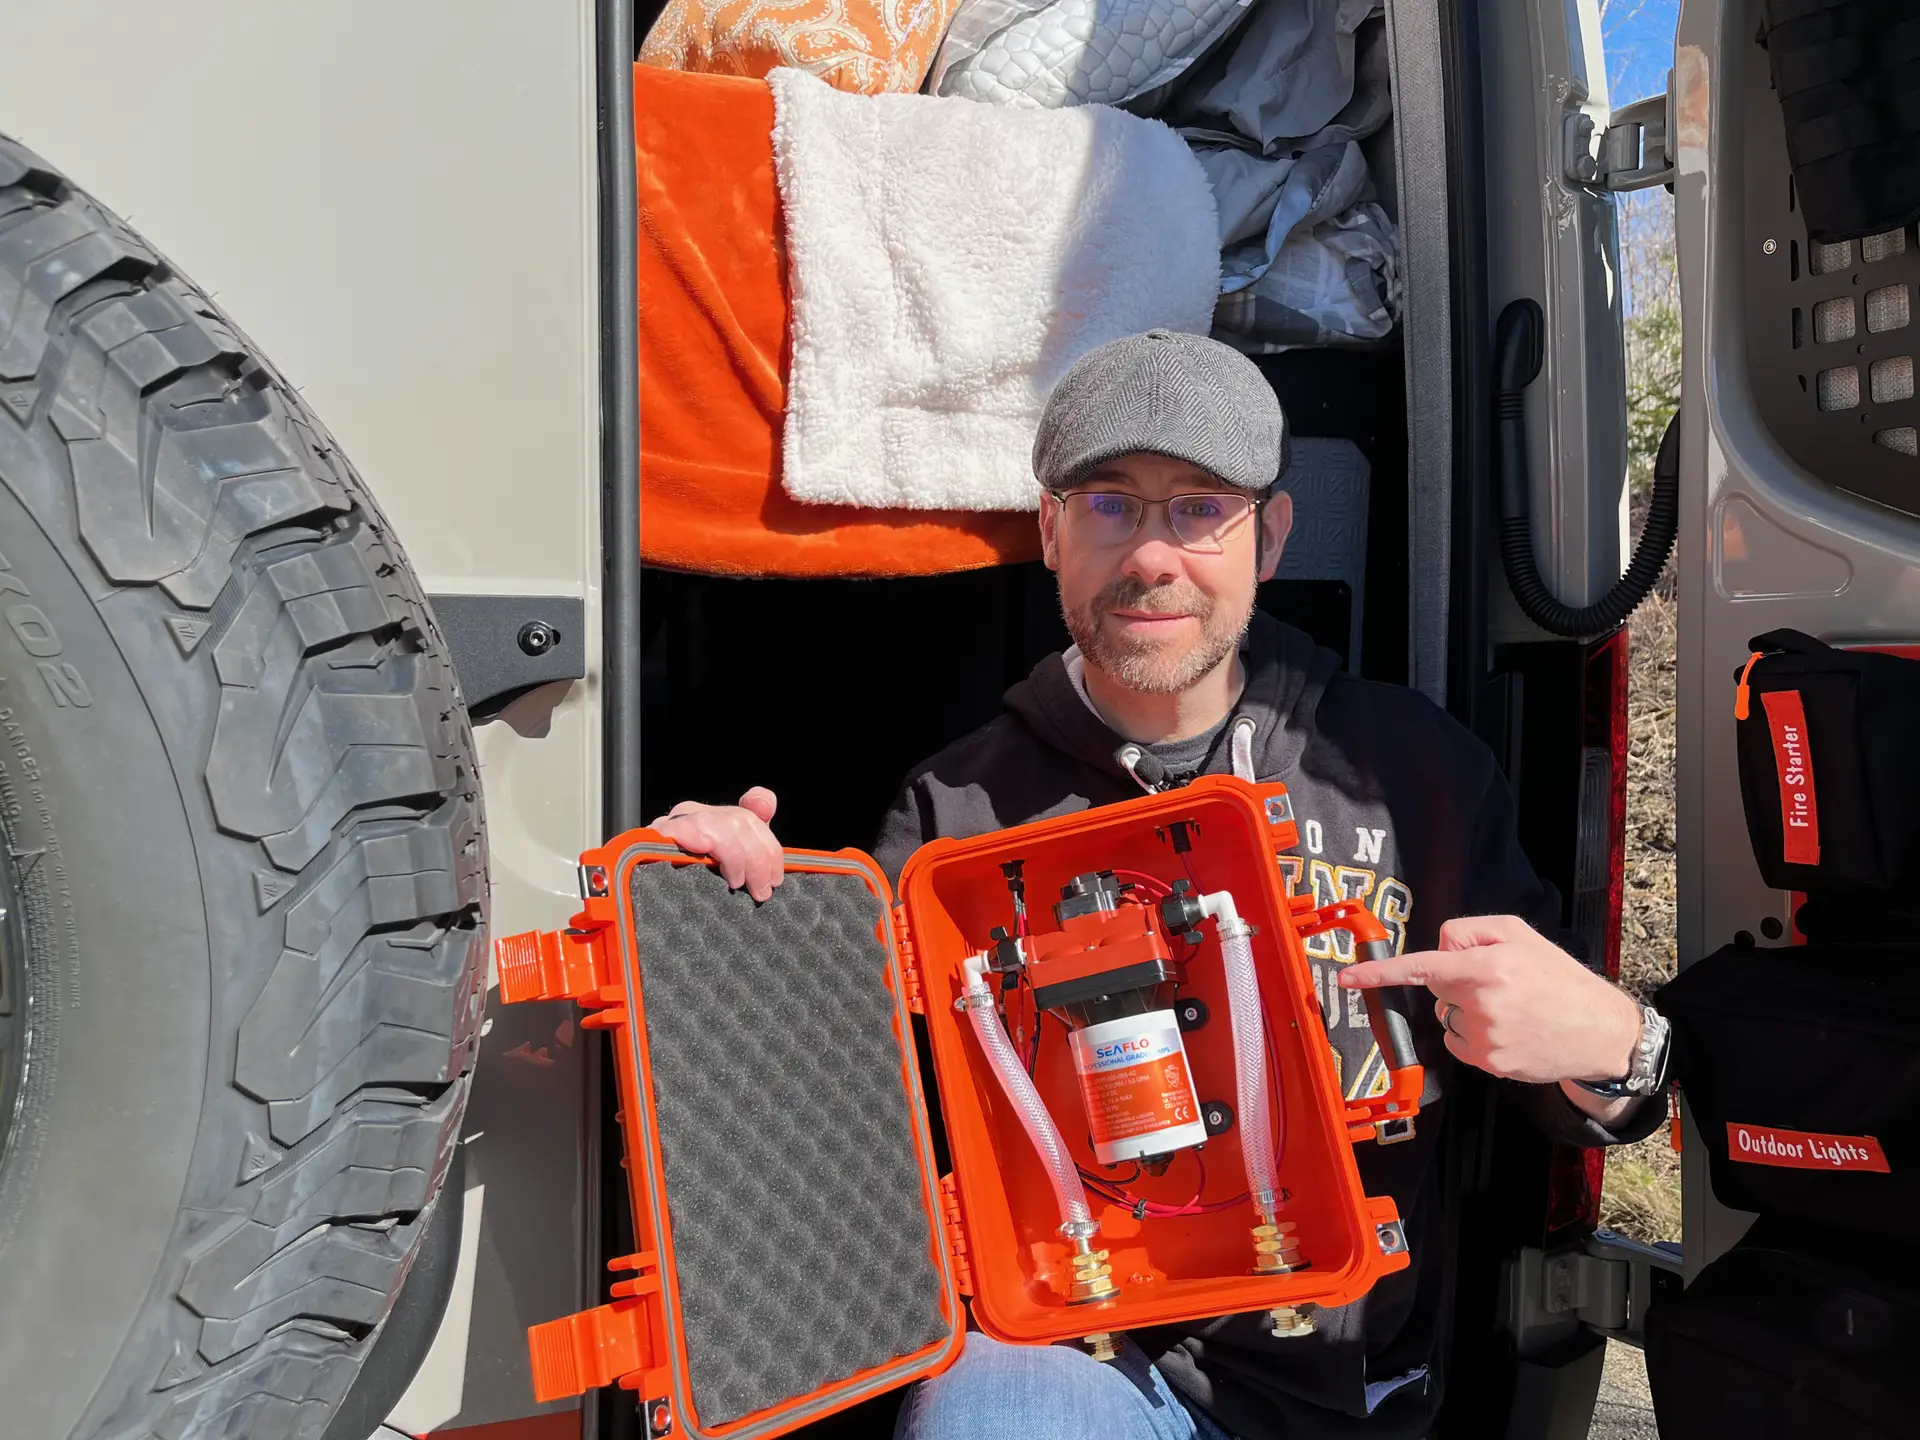
The first component of our extended van water system is a portable, customizable water transfer pump. Unlike permanent installations that eat up valuable interior space, this solution tucks away neatly when not in use.
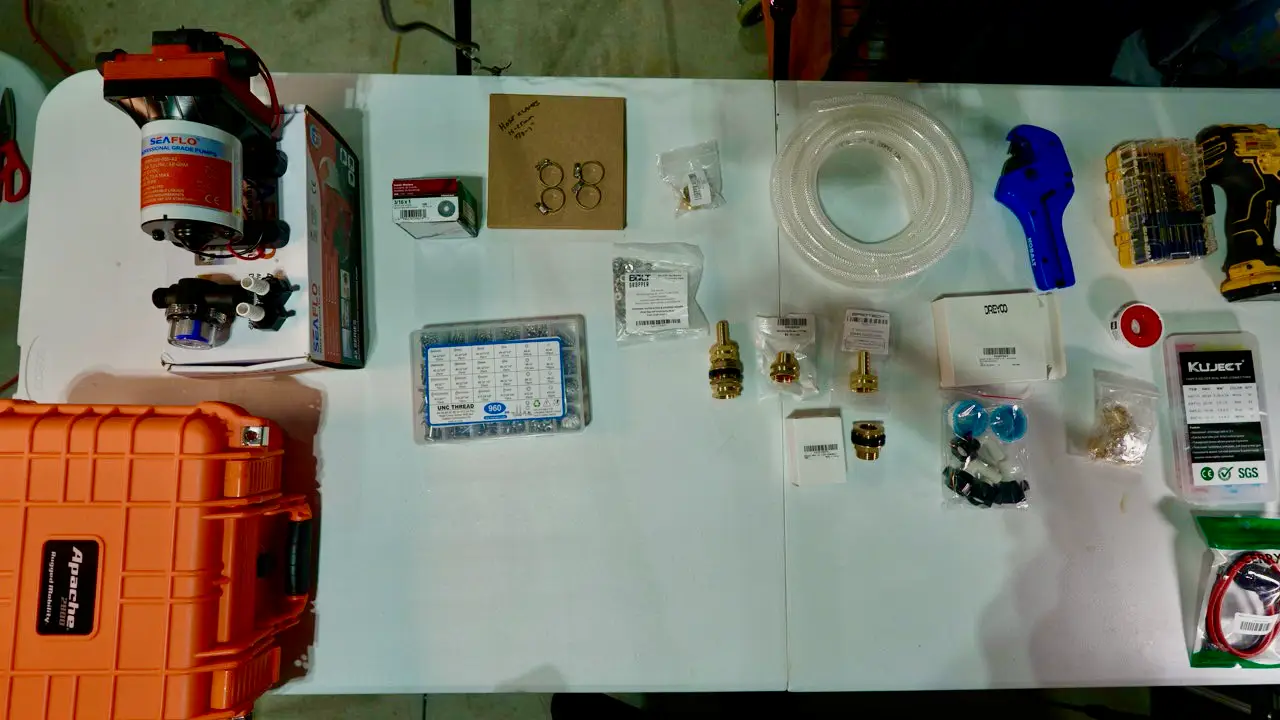
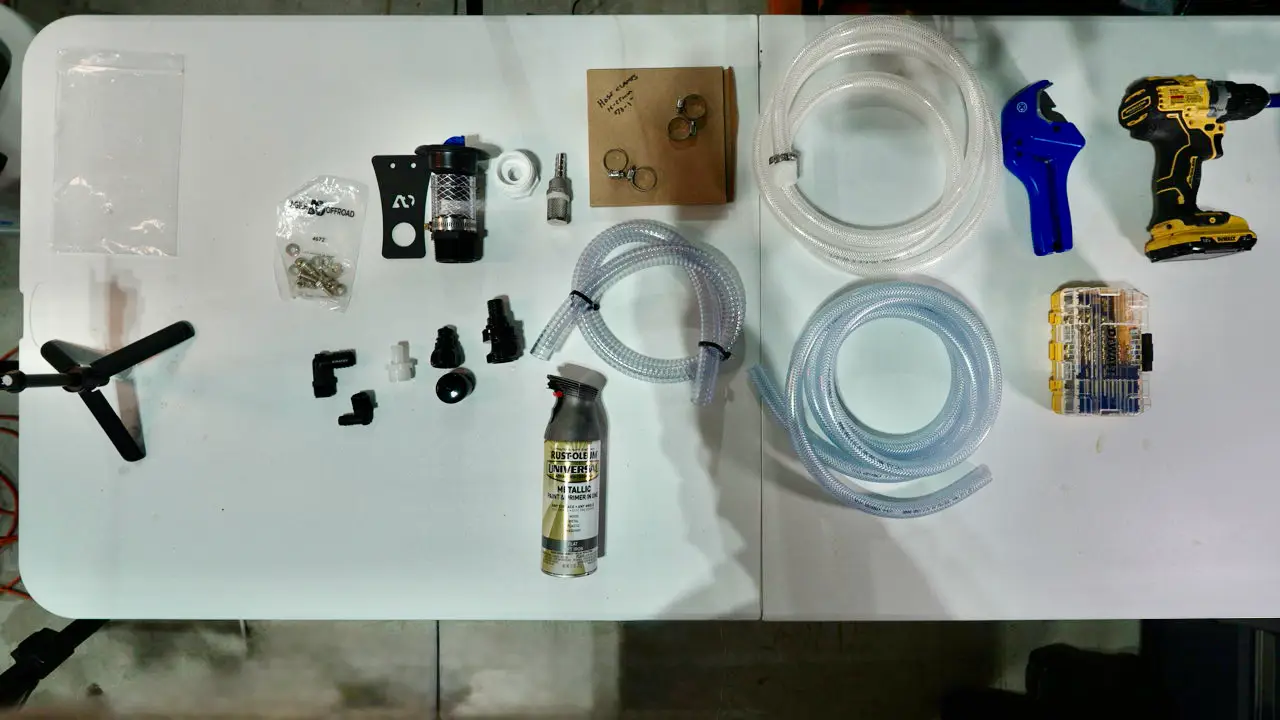
What You'll Need
- Harbor Freight Apache 2800 case (about $30)
- Seaflo 12V 3 gallon-per-minute pump
- Anderson connector
- On/off switch (20 amp)
- 12V cigarette lighter adapter
- Hose clamps, washers, nuts, bolts
- Garden hose fittings
- 1/2″ flexible tubing
- Step drill bit
- Heat shrink connectors with solder
You can find everything we used at our affiliate list on Amazon.
The Build Process:
First, I prepped the case by drilling all necessary holes before assembly—a lesson learned from watching other builders struggle to fit everything afterward. Using a long 1/8″ drill bit made it easy to create mounting holes for the pump, plumbing fittings, power switch, and Anderson connector.

The electrical setup is straightforward: connect the negatives together, run power to the switch, and from the switch to the pump. I used heat-shrink connectors with built-in solder for waterproof connections. For power, I opted for a cigarette lighter adapter rather than alligator clips since our van has accessible 12V ports.

For the plumbing, I used 90-degree elbows on the pump, added Teflon tape to prevent leaks, and connected everything with flexible tubing secured by hose clamps. A quick test confirmed the pump worked perfectly, pulling water through one connection and pushing it out the other.

Part 2: The 28-Gallon Auxiliary Tank
A pump without additional water capacity solves only half the problem. The second part of our van water system involves installing a 28-gallon water tank underneath our Sprinter van.
What You'll Need
- 28-gallon water tank (purchased from Agile Off-Road)
- Agile Offroad Installation kit with mounting hardware
- Fill hose and overflow drain hose
- NPT fittings
- Quarter-inch drill bit
- Rust-resistant paint
- Bug screen for the overflow drain (optional)
The Installation Process:
Installation began by lowering the spare tire basket underneath the van (we had already removed our spare tire as we have a different tire size, and the spare is mounted on the back).

The tank fits perfectly in this space. I installed two NPT fittings—a larger one for the fill port and a smaller one for the overflow drain/breather. Teflon tape on the threads ensures a watertight seal, hose clamps are something you can add for extra assurance.

Next came mounting the tank bracket for the fill port to the van’s pinch welds, about four inches from an existing air compressor bracket. After drilling holes, I applied rust-resistant paint to protect the exposed metal before securing the bracket with the provided hardware.


The fill hose connects to the tank’s fill port, while the overflow drain runs along the underside of the van, ending with a bug screen to keep insects out. Everything gets secured with zip ties to prevent movement while driving.

Testing the Complete System
With both components installed, I tested the system by filling the external tank with a regular garden hose and then using our custom pump to transfer water. The pump connected easily to the 12V port in the van and performed flawlessly, quietly transferring water at a good rate.


Cost and Benefits of Your Extended Van Water System
Building this extended water system wasn’t overly complicated or expensive—around $250 for the pump components plus the cost of the tank and installation kit, which can run around $300+, but you may not need this for your setup.
Return on Investment
- Longer stays in beautiful locations
- Fewer trips to find water sources
- Freedom to explore areas most van dwellers have to skip
- No sacrifice of valuable interior storage space
Frequently Asked Questions About Van Water Systems
How much water capacity do you need for van life?
Most van dwellers find that 2-5 gallons per person per day is typical usage. With our 48-gallon capacity, two people can comfortably stay off-grid for 4-6 days with normal usage, or longer with conservation.
Is the auxiliary tank safe for drinking water?
Yes, when you purchase a food-grade water tank specifically designed for potable water. The tank we used from Agile Off-Road is made from FDA-approved materials safe for drinking water.
Can this system work with any type of van?
While we implemented this on a Sprinter van, the concepts can be adapted to virtually any van with undercarriage space for a tank. Northwest Conversions sells a 24-gallon spare tire tank for the Ford Transit. The portable pump component works with any van that has 12V power.
Final Thoughts
I should mention that this isn’t my original idea—credit goes to Dave at Big Truck Big Travels, Ferg TV, and the folks at Suite Travel who pioneered similar setups. I’ve simply adapted their concepts to work perfectly for our Sprinter van setup.
Have you tried extending your water capacity? Are you planning to build something similar? I’d love to hear about your solutions in the comments below. If you found this helpful, don’t forget to subscribe for more practical van life upgrades and adventures on the road!
Until next time, check out the videos of our van water system project and enjoy those extra days in paradise with your improved van water system!

